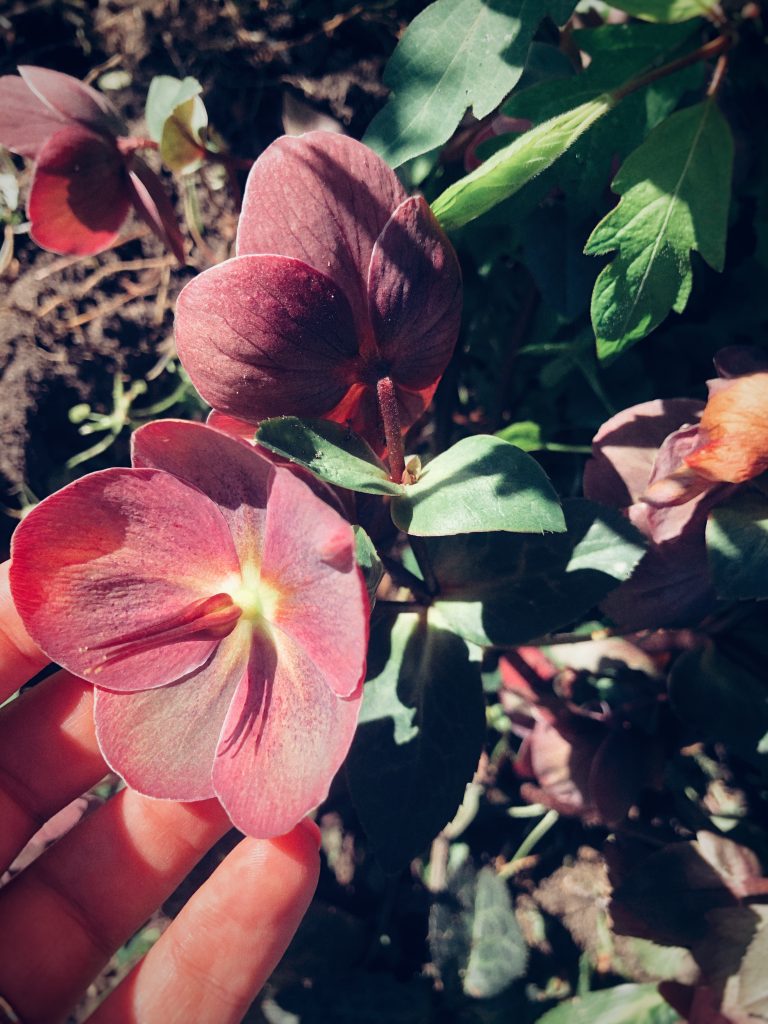
Hello, Hellebores

I always think of Hellebores as a frosty New Year’s Eve sort of flower, blooming just as the world has become a little too grey for too long. Alas, because of this, I also associate them with hellish New Years Day hangovers and emergency trips to McDonald’s Drive Thru which, let’s face it, isn’t quite the romantic effect I was hoping for.

Flowering in late winter and on into early spring, I’m starting to think that no garden can be complete without them. And as my garden is far from complete, it’s time to pop some in.
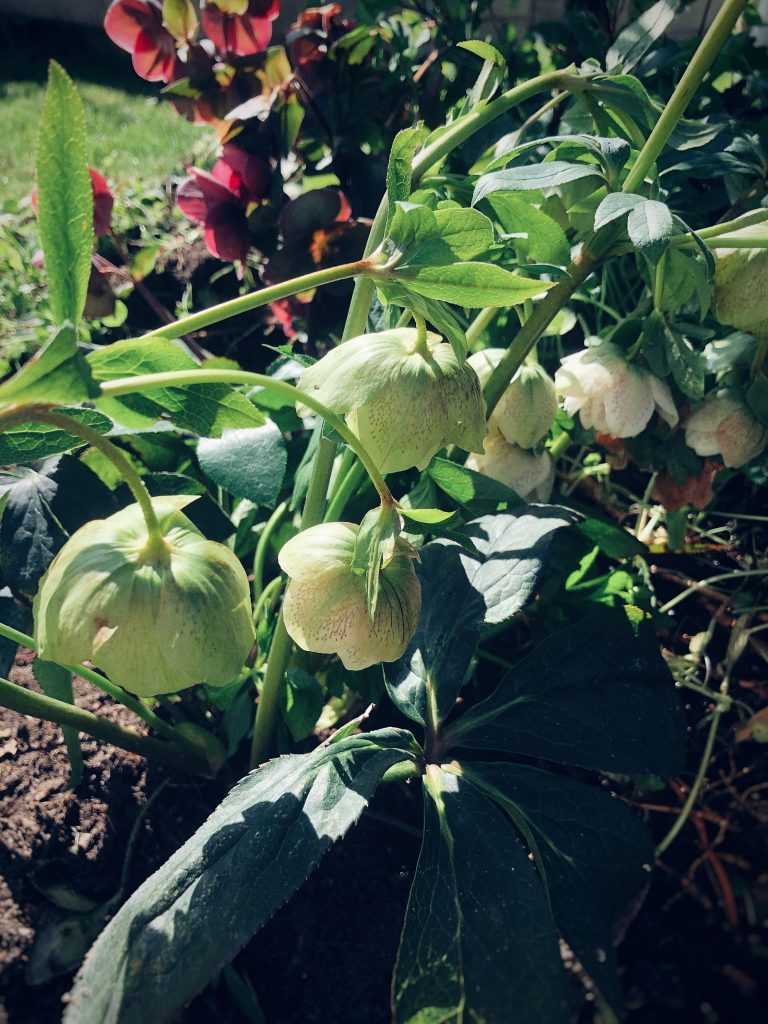
Hellebores are a part-time gardener’s dream. Easy to plant and easy to look after, their plants grow larger (and more prolific) year on year, with very little maintenance needed. And best of all… they prefer to be planted in dappled shade. Which is lucky, because 60% of my new garden falls into that category.
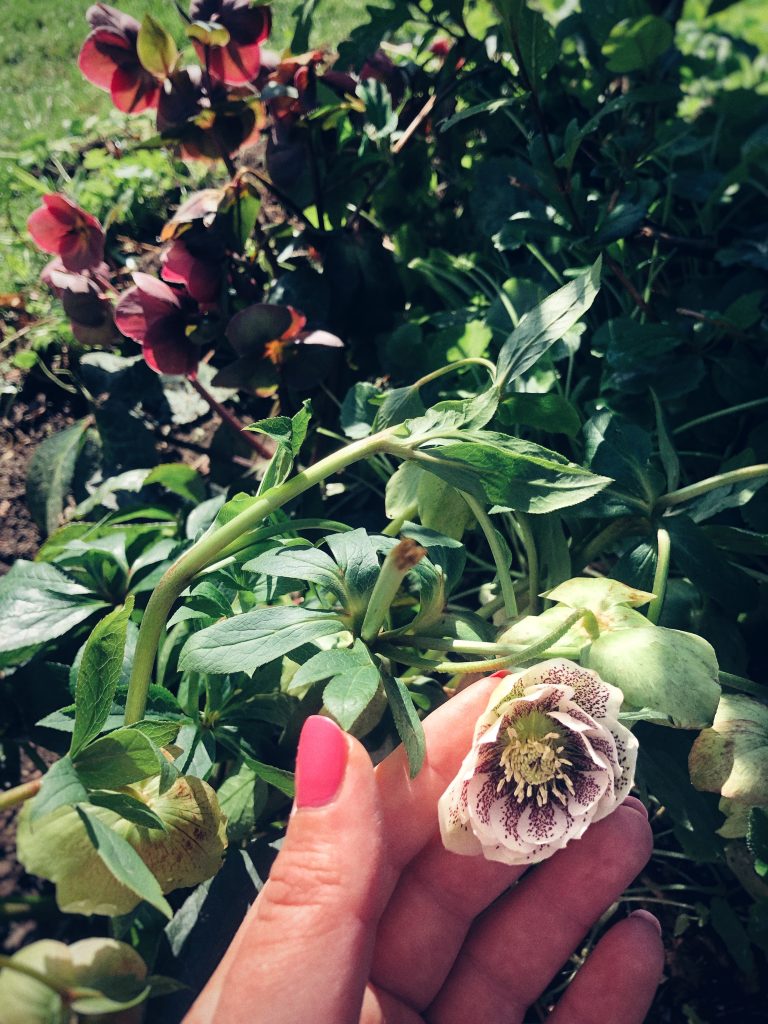
There are hundreds of varieties to choose from. I’ve opted for a ‘Cinderella’ hybrid variety (above) and a dark purple Lenten Rose (below). The Lenten’s are getting on a little (I may have left them on the doorstop for a little too long), so have dropped their yellow anthers, but they’re still going strong.

I’ve planted mine at the base of our lovely old silver birch. I’ll be able to see them from the window come Christmas, and they’ll start to fill the rather barren bed I’ve created there.
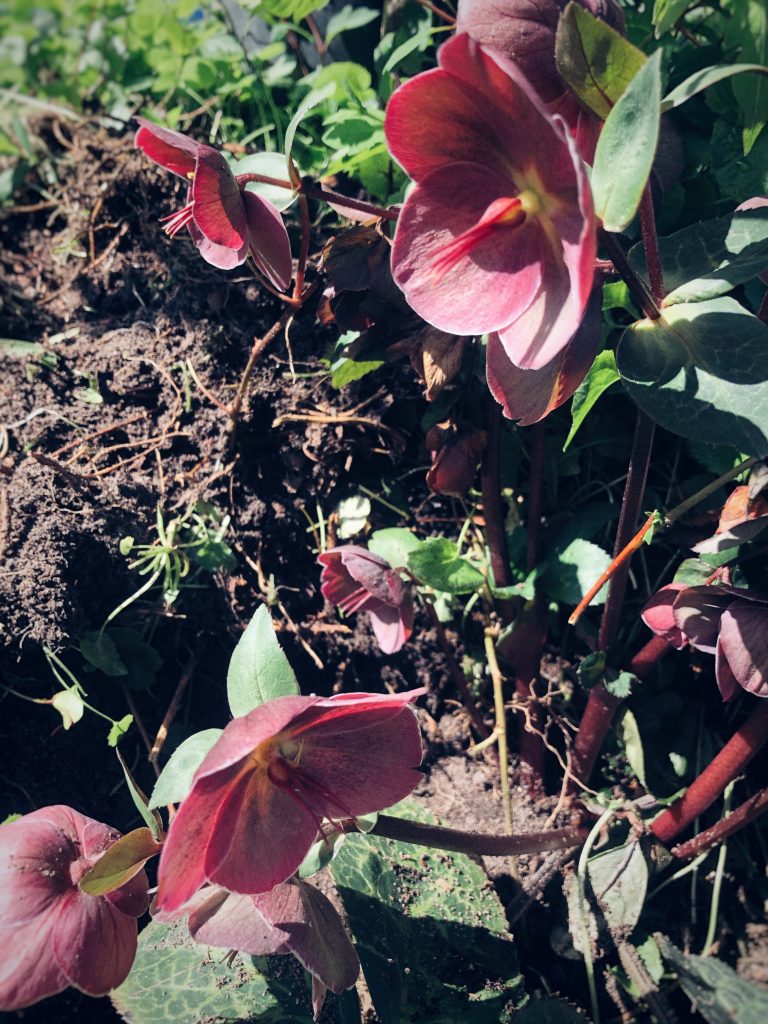
To plant:

  • Hellebores like rich, well drained soil, so make sure that you turn over the soil and dig in some rich organic material, such as leaf mulch or chipped bark (well rotted manure would work too).
  • Dig a hole a little bigger than the pot your Hellebores come in, tip out and loosen the roots a little, then plant and pat the soil around them firmly.

Hellebores will be very pleased if you water them during dry spells, and positively elated if you mulch them every autumn (with leaf mould, chipped bark, etc.)

Unlike me, Hellebore flowers are subtle in nature, so it’s worth cutting back dead and large leaves in late spring/ early winter to give them some room. It would be a shame not to see them. This will also help to protect them from a nasty sounding disease called ‘Hellebore Leaf Spot.’

Go forth and Hellebore.


Pickled Magnolia Flowers

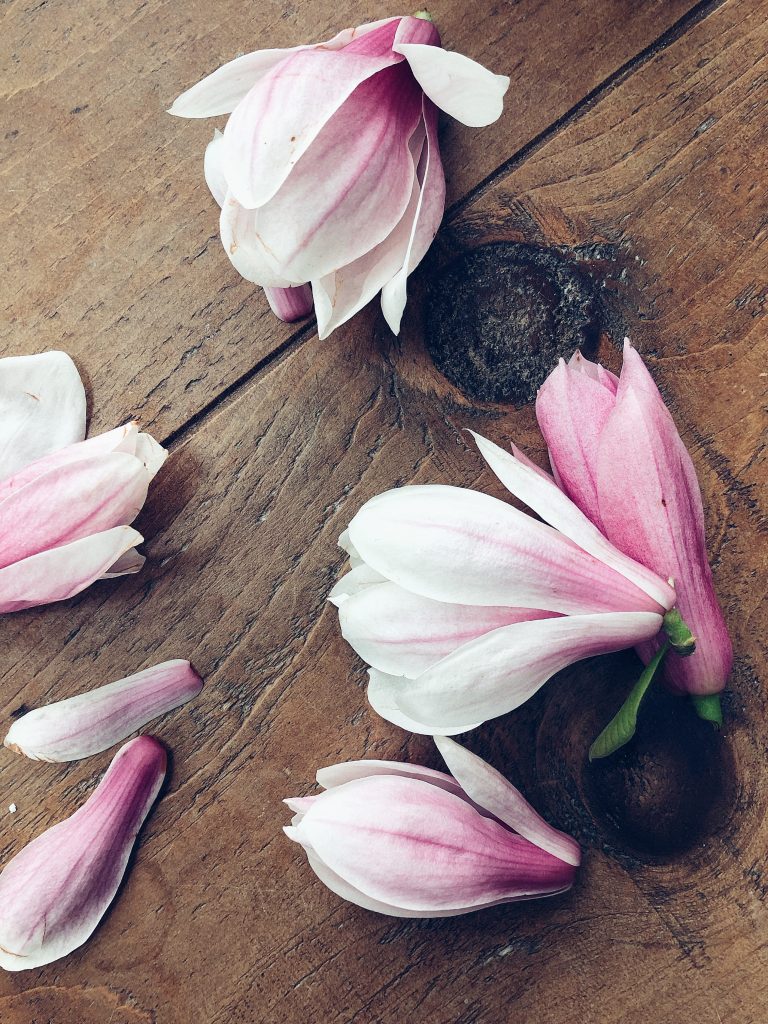
Hold onto your magnolia-luvin’ hats, people, for I come bearing news: magnolia flowers are edible. I know. All those years taking pictures for Instagram when we could have been eating them instead.

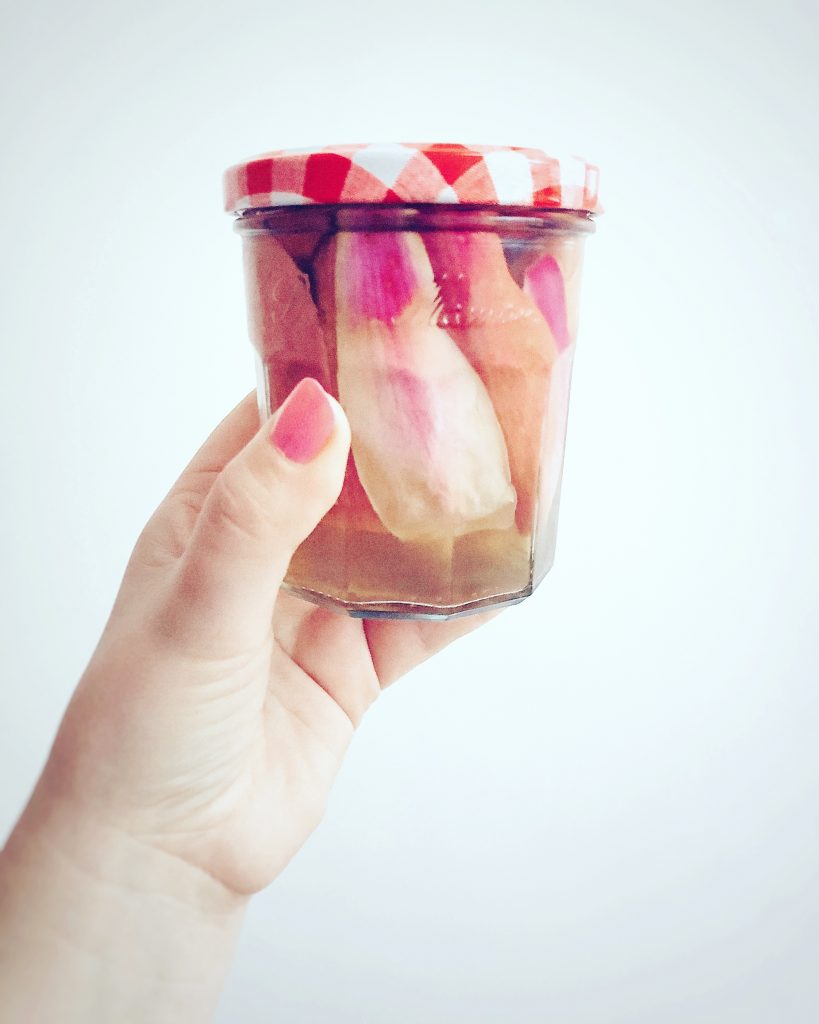
A little punchy in their fresh form, magnolia petals transform into a downright delicacy when pickled. With a unique floral/ ginger taste, the end result is akin to the Japanese pickled ginger that accompanies your sushi, delicate and dusty pink in hue.

Alas, I do not have a magnolia tree in my garden. I stole some. From a church yard. So I hope you like this recipe because I’ll be going to hell soon after.

Here’s what you’ll need:

  • magnolia flowers (I used 5 blooms for 1 jam-jar of pickles)
  • 350ml cider apple vinegar
  • 150ml water
  • 120g caster sugar
  • A little ice
  • 1 sterilised jam jar

Method:

Prepare a large bowl of iced water. Carefully separate the petals from your magnolia flowers, discarding any bruised/ damaged blades, and plunge them into the iced water. This will both wash them and keep them from spoiling while you make the pickling liquor.

For goodness’ sake, turn on the extractor fan. No one wants a face full of pickle steam. Apart from that, it’s very easy. Tip the vinegar, water and sugar into a saucepan and simmer, stirring until the sugar has dissolved. Set to one side to cool.

To prepare your jar, arrange the petals vertically – working from the outside in – until full. Pour over the pickling liquor, right to the top, then seal the lid tightly.

N.B. I’ll return with an update on ‘how long to leave them’ . This is definitely a leave-it-in-the-fridge recipe, and I’d take bets that 4 weeks pickling should do the job, but I’ll check them every 7 days and report back. 

Serve alongside sushi, sprinkled over salads, added to elaborate burger + bun combos, or resting atop a particularly posh open roast beef sandwich. Pickle heaven.


Starting Again In A New Garden

Where the hell have I been? That’s the question. Wherefore the pub shed? The wankery of brussel sprouts? And what happened to my garden?

I wrote the following post a while back. A year ago, in fact. Just as escalating building work, a farcical amount of scaffolding, and the small matter of having a baby stopped me from getting into the garden altogether. But another spring rolls on round, the tiny maniac is asleep, and my laptop is finally open. Shall we try this again?              

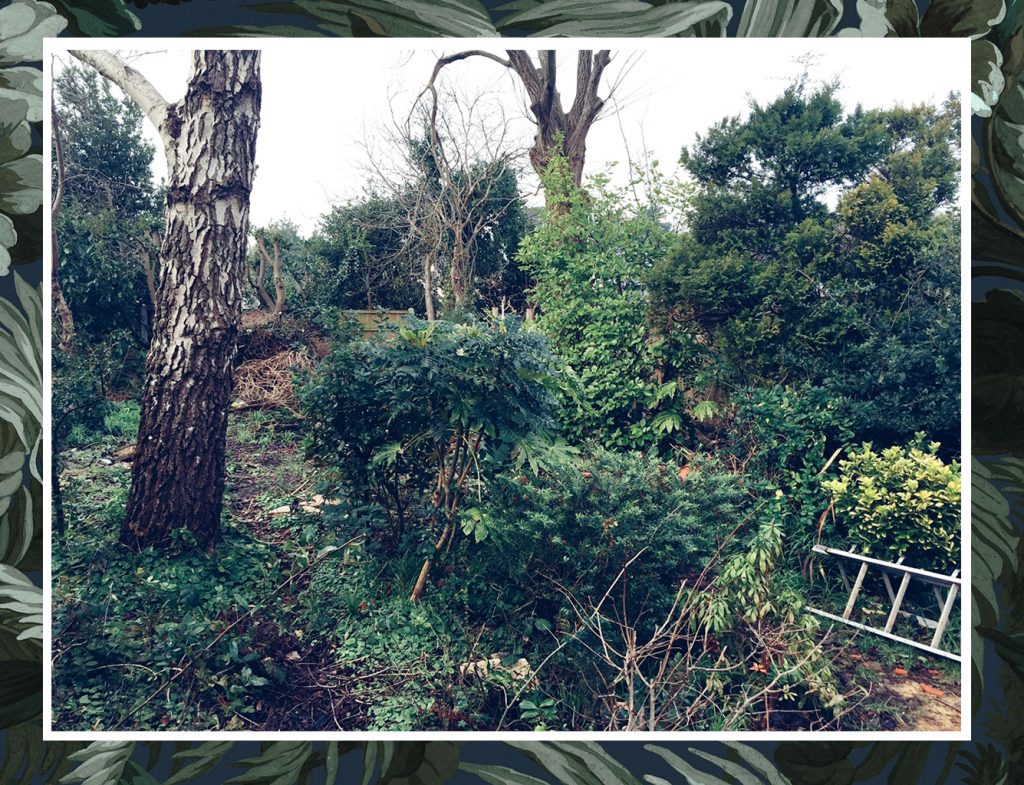
The garden is mocking me. I stand in the only shaft of light to have made it through the tangle of silver birch, willow and holly overhead. A chiffchaff calls. A breeze rustles the 6ft wall of nettles surrounding me, and I experience a moment of… total and utter despair. Bloody nature. It’s gone feral. Our new garden is beyond overgrown. Heart of Darkness. Manderlay. The Lost Gardens of Heligan. They have nothing on this sub tropical nemesis I now call home. (Albeit on a slightly more suburban scale.)

How has this happened? How have we ended up here, instead of the 2-bed London basement flat we called home?

All I can say is, life has a dubious sense of humour.

A little while ago everything went tits up. Tim’s business reached its end… and so did I. Bloody advertising. The travel and the hours and the politics and the pressure and the scramble for awards and recognition and ‘success’ – the utter brutal nonsense of it all – finally took its toll. I burnt out. Lie-on-the-floor-in-a-ball burnout. It isn’t pretty. We are both flattened and lost and in the wrong place.

So we do the grown up thing: we run away, arms flailing. Sell the flat. Cut our ties. Throw everything into the air and land here, in this untamed garden by the sea. We are both bruised. Battle worn and homesick. But not defeated. On the contrary. There is healing to be found here.

I break concrete with a sledgehammer. Saw great trunks of holly. Rip ivy and bindweed from the ground with my hands. I hack and I tear and I cut away. Find light and fight like hell to let it in.

I feel better than I have in months. We both do. Because under the mess, beneath the neglect, amidst the tangle and confusion and disarray lie hidden treasures. An apple tree, leaning, half strangled with ivy and in need of attention, but a lovely old apple tree with life in it yet. Lilac. Rambling rose. Long forgotten alpine strawberries. A currant of some description. Periwinkle, passion fruit, and copper beech; white weigela, euphorbia, enormous mock castors, verbena and montbretia. A rosemary bush. Bluebells and three-cornered leeks. Everything needs saving. Everything needs sun. Everything needs a second chance.

I disappear into nature. To the quiet and the rain and the small everyday battle of my will against the garden’s. As I write, there is a layer of soil beneath my fingernails that no amount of nail varnish can hide. I have torn open my thumb on a rose, and am sporting the type of dodgy quiff that can only be achieved by sweating profusely beneath the peak of a trucker cap. But do I care? Not one bit, it turns out.

For a long time I lived in a world of immediate results. This garden will take time. Far more than I’m comfortable with or used to. There is so much to do. So much to plan and dig and plant. But there is also a cuckoo calling in the woods behind me.

Perhaps I will sit and listen a while.


How To Find Wild Garlic


When: March – early June
Location: Common throughout the UK and Ireland 

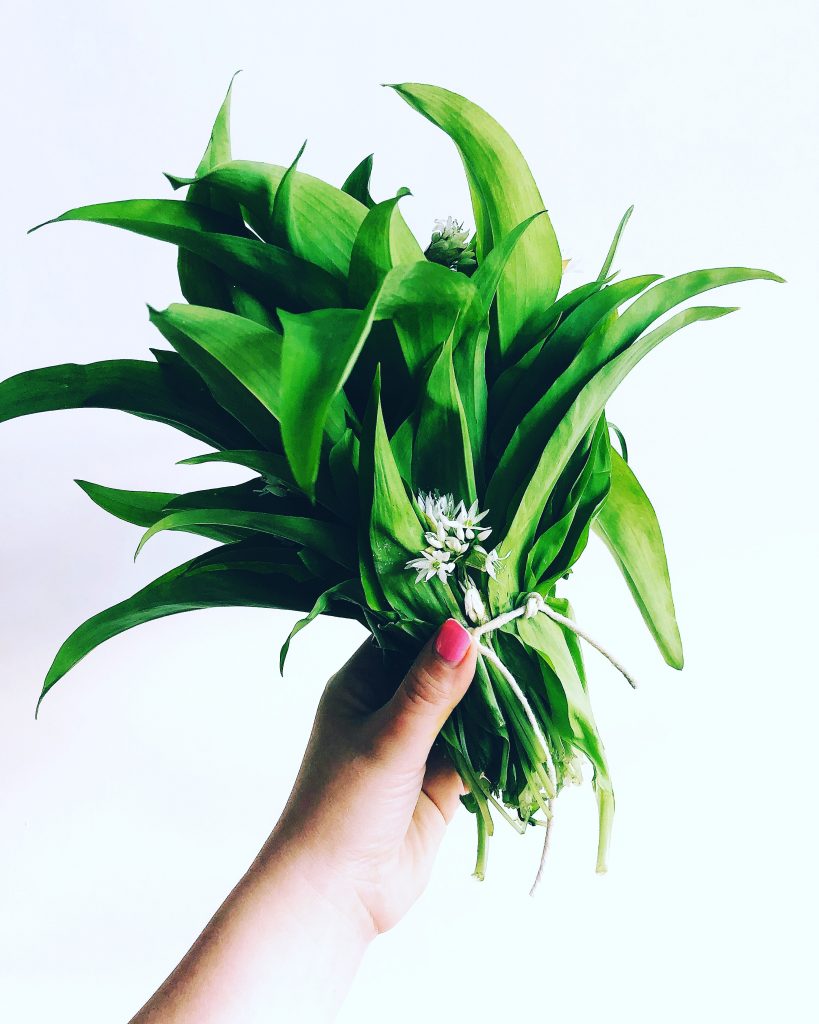
The arrival of spring brings with it one of the finest and most versatile ingredients our woodlands have to offer: wild garlic. Also known as wood garlic, ramps, or – in a particularly romantic Hardy-esque fashion – “ramsons”, wild garlic is native to most of Europe, having grown in our woodlands for centuries.

Being high-end restaurant-fashionable these days, the wild garlic found at farmers markets and Notting Hill grocers is horribly expensive to buy. Which is madness, because take a walk in the woods… and it’s totally free, growing en masse under our trees. See?

Despite its strong scent, wild garlic’s flavour is actually far more mellow than everyday garlic bulbs, adding a gentle, deep note to dishes. Chopped into salads, blitzed into pesto, folded into scrambled eggs and homemade mayonnaise, added to risotto, or simply cooked in place of spinach it’s no wonder this versatile ingredient has become so popular.

P.S. There is one more name for wild garlic… Bear garlic. Apparently the loveable kill-you-with-a-single-swipe-of-the-paw fellas are as partial to wild garlic as I am, munching away on the leaves after hibernation to kick-start their digestion. Though the UK isn’t exactly inundated with bears, I’d keep a marmalade sandwich in your pocket just in cases.

Where To Find Wild Garlic:

Come springtime, you’re likely to find wild garlic growing rampant beneath the dappled canopy of deciduous woodland. Tall oaks, swaying beech and elm, sprawling branches of hazel hornbeam and ash – these are the classic woods of National Trust trails, stately homes and Winnie The Pooh.

Enjoying cool damp soil and a gentle slope, wild garlic thrives in managed, not-too-dense woodland where the leaves let in sunshine between their branches. Wooded riverbanks and banks are another prime wild-garlic-finding spot. I even found it in a graveyard once, but that seemed rude.

How To Spot Wild Garlic:

You will smell wild garlic before spotting it. Where one wild garlic plant grows, so hundreds follow – great carpets of the stuff rollicking across the woodland floor, up to 50cm tall.

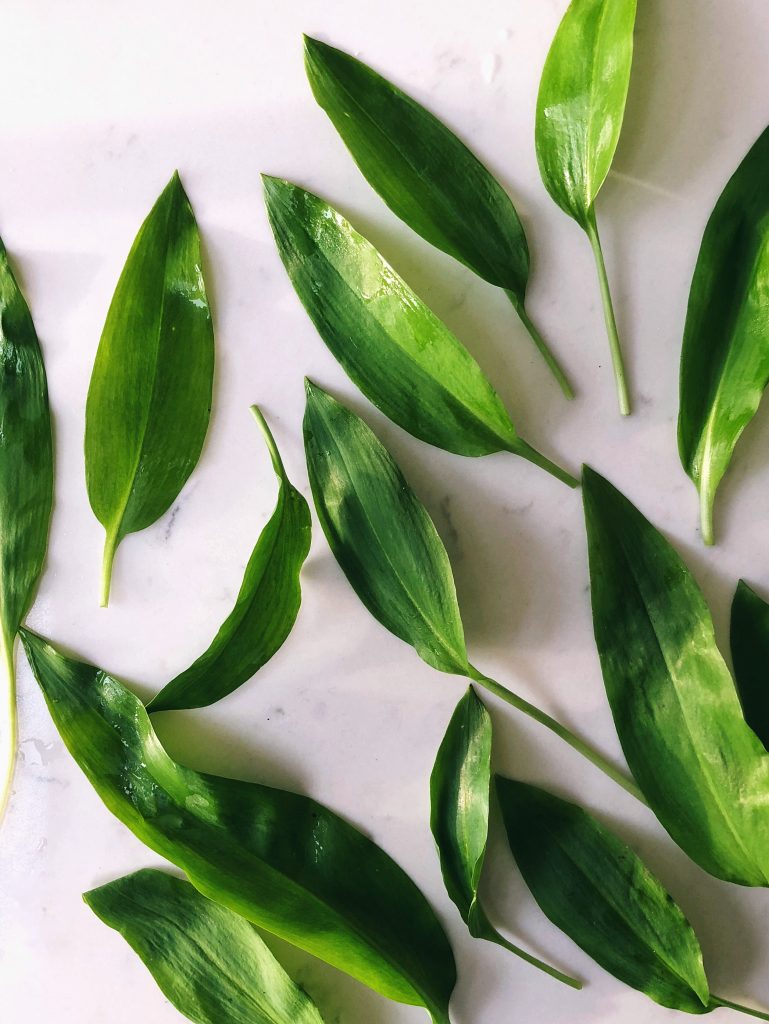
Smell aside, wild garlic is easy to spot. Long pointed leaves of vibrant green, slightly fatter in the middle before tapering to a point. Towards the end of the season, wild garlic sends up lovely scruffy allium-like pom pom flowers. Hurry… these white 6-petalled blooms signify the end of wild garlic’s growing season. On the upside, you can eat the flowers too.

Don’t Confuse With:

Lilly Of The Valley, which is poisonous. Growing in a similarly rampant carpet-like fashion, its leaves look very similar to wild garlic leaves. Luckily, there’s an easy and virtually foolproof way to tell the difference… Lilly Of The Valley’s leaves don’t smell of garlic. Crush one between your fingers and, if that distinctive garlicky-onion smell doesn’t immediately hit you in the nose, throw it away. When in flower it’s easy to tell, as they send up pretty little white bell-shaped flowers from a straight central stalk.

How To Pick:

Wild garlic leaves are at their best and strongest from March to May, before the plants flower. Harvest leaves, stems and flowers using scissors or a sharp knife so as not to damage the plant, leaving the bulb in the ground to grow again next year.

Will Keep For…

3-5 days if kept in the fridge. Wash before using.


Wild Garlic and Prawn Gyoza

As a certified enthusiast of dumplings in all their guises, imagine my delighted dim sum surprise when I realised how easy they are to make at home. Freshly picked wild garlic adds both a mellow spring freshness, and a lovely dash of colour to the plate.

These are the Japanese gyoza members of the dumpling family. I’m deploying the “no need for a fiddly steamer” frying pan method here: so much simpler than anything else I’ve tried, with no need to buy new kitchen equipment and the added Brucey bonus of crispy golden dumpling bottoms to boot.

We’ll be using ready-made wonton/ dumpling wrappers, available from your nearest Chinese supermarket. (Well worth a slightly terrifying trip to the local industrial estate, I say.) You’ll need a blender to make the filling.

Makes 30 gyoza.

Here’s what you’ll need:

For the filling:

  • 450g raw king prawns, de-veined (if you can be bothered)
  • 4 big handfuls wild garlic, washed
  • 225g tin water chestnuts
  • 1 long red chilli, deseeded
  • 3cm piece ginger, peeled
  • 1 tsp sesame oil
  • 1 tbsp soy sauce
  • 30 dumpling wrappers

For the dipping sauce:

  • 2 tbsp soy sauce
  • 2 tbsp rice wine vinegar
  • 3 tbsp sweet chilli sauce
  • 1 tbsp runny honey
  • ½ red chilli, deseeded, sliced into fine rounds

Method

Tip your prawns, wild garlic, chilli, ginger, soy sauce and sesame oil into a blender and blitz to a paste. Just towards the end, add the water chestnuts and pulse for a few seconds – so that they’re mixed in, but still have texture.

Then it’s on to the gyoza assembly line. Unlike the slickly automated process of, say, car manufacture, gyoza production is a far more delicate, fiddly, and imperfect. It also takes AGES so rope in some hapless fools/ friends to help.

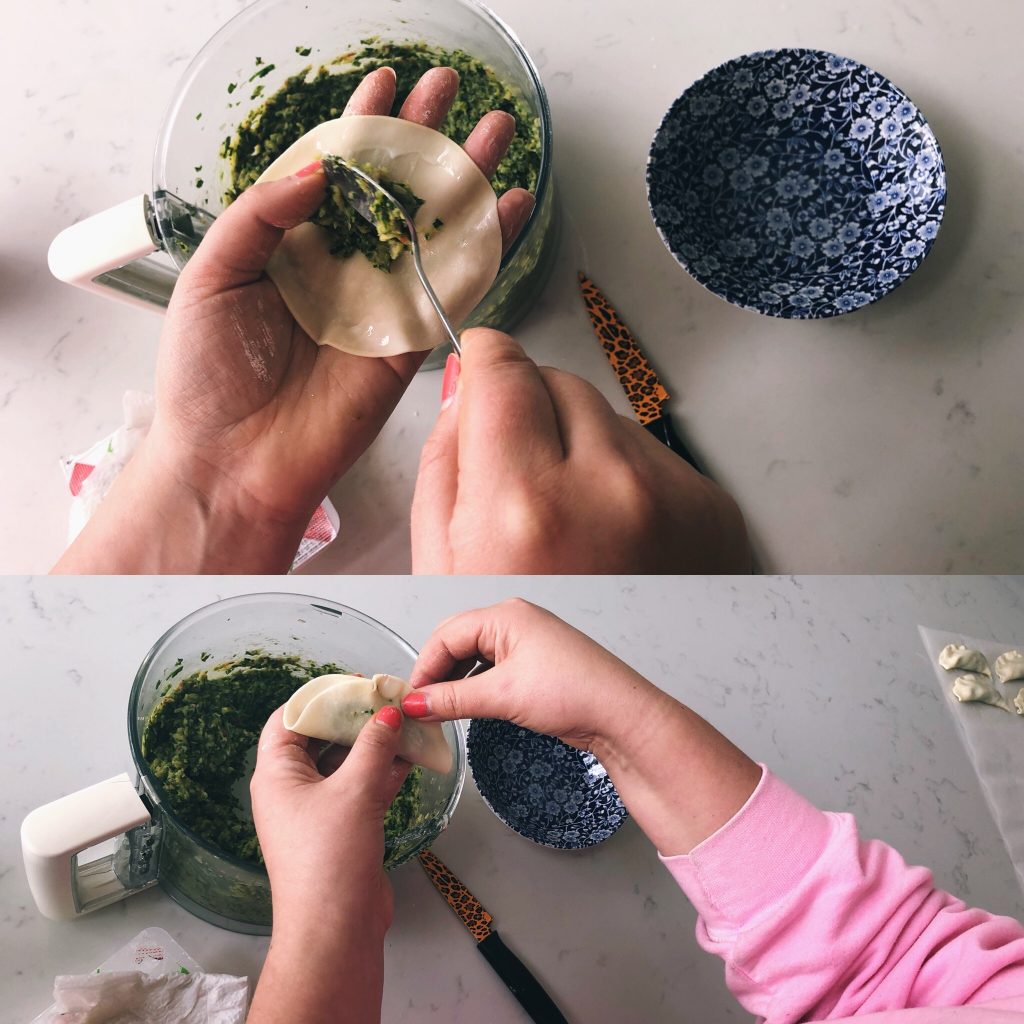
Keep the dumpling wrappers covered with a damp cloth/ kitchen towel until needed to keep them from drying out. Prepare a clean flat surface with baking paper, place a cold bowl of water within arm’s reach, then carefully peel away a wrapper and rest it in the palm of your hand. Dip your finger into the water, then run it around the edge of the wrapper in to moisten. Spoon 1 heaped teaspoon of mixture into the middle (don’t overfill or it will be a nightmare to seal).

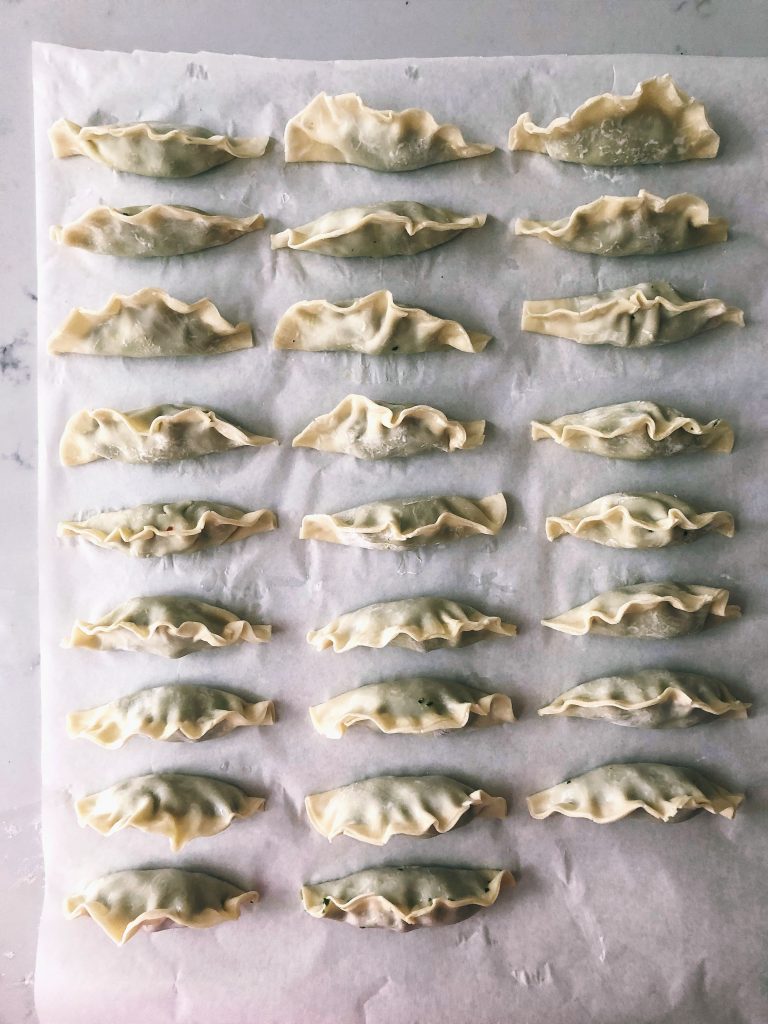
To seal, dip your fingers into the water again, then gently squeeze together the edges of the dumpling wrappers into a sort of neat-ish fan/ tiny Oriental Cornish Pasty shape. Place them fat-bottom down Repeat 29 times. I find a glass of wine helps proceedings.

Place a large non-stick frying pan over a medium flame, adding a splash of sesame oil. When hot, carefully add a batch of dumplings, flat little bottoms down, making sure none of them touch. Cook until crisp and golden underneath.

Now for the clever bit. Using a jug, pour tap water straight into the frying pan, to a depth of roughly 1cm. Do this quickly and stand back as it’s likely to hiss like a pissed-off swan. Whack up the heat and cover with a lid to bring to the boil. Once boiling, reduce the heat back down to medium and, lid still on, let them steam for roughly 8 minutes. Quickly mix together your dipping sauce and set to one side.

When 8 minutes is up, remove the lid and cook off the last of the water so that your gyozas’ bottoms crisp up again if needed.

Serve right away on a nice plate, dipping profusely while dramatically gesticulating with your chopsticks.


How To Grow Snowdrops

Nature can be a cruel mistress. 99% of the time, when you see a flower growing in the sunshine – a blowsy great tulip, say, or flawless peony – the ideal time to plant them has already passed. Months prior, in the cool of autumn.

Not so the snowdrop, gawd bless it.

As most hardened gardeners will tell you, growing snowdrops from bulbs is hit and miss at best, downright rage-inducing the rest of the time. The true way to guarantee swathes of delicate snowdrops at home in your own garden is to grow them “in the green.” A poetically horticultural way of saying “plants, instead of bulbs,” waiting until the flowers are just going over before planting them.

And that means… you haven’t missed your chance to plant snowdrops this year. Buy them from your local nursery or order them online right now, and you’ll be ready to plant them out just as soon as these frosts are over.

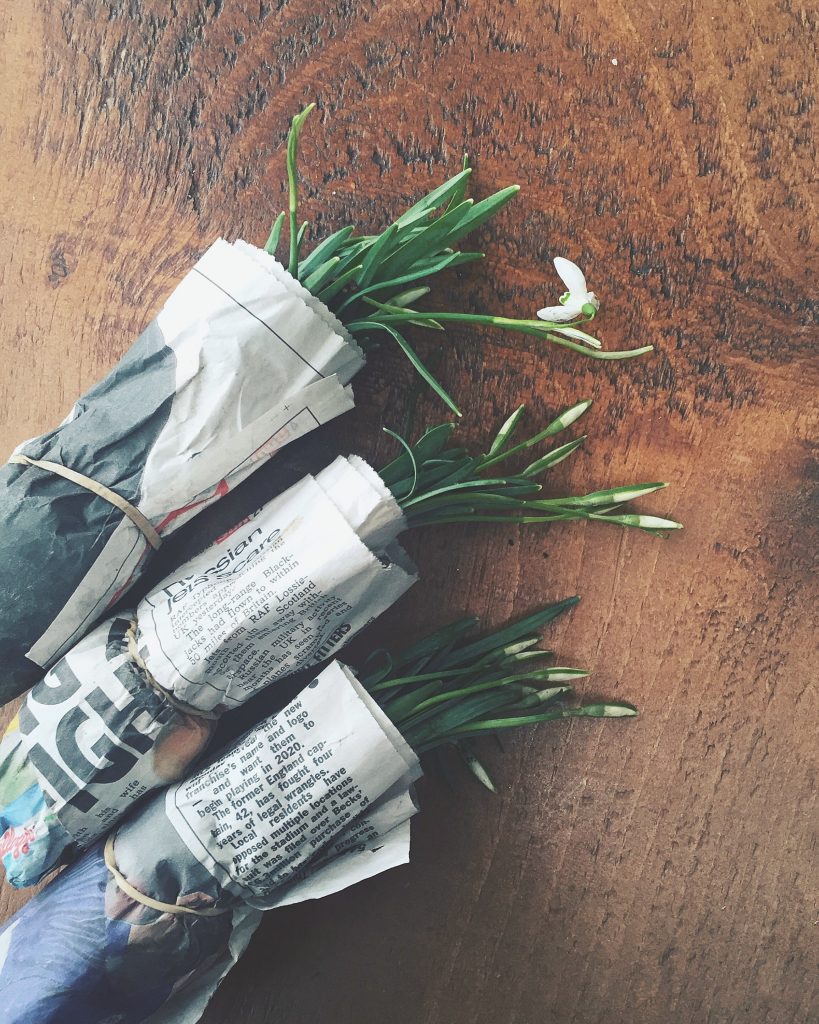
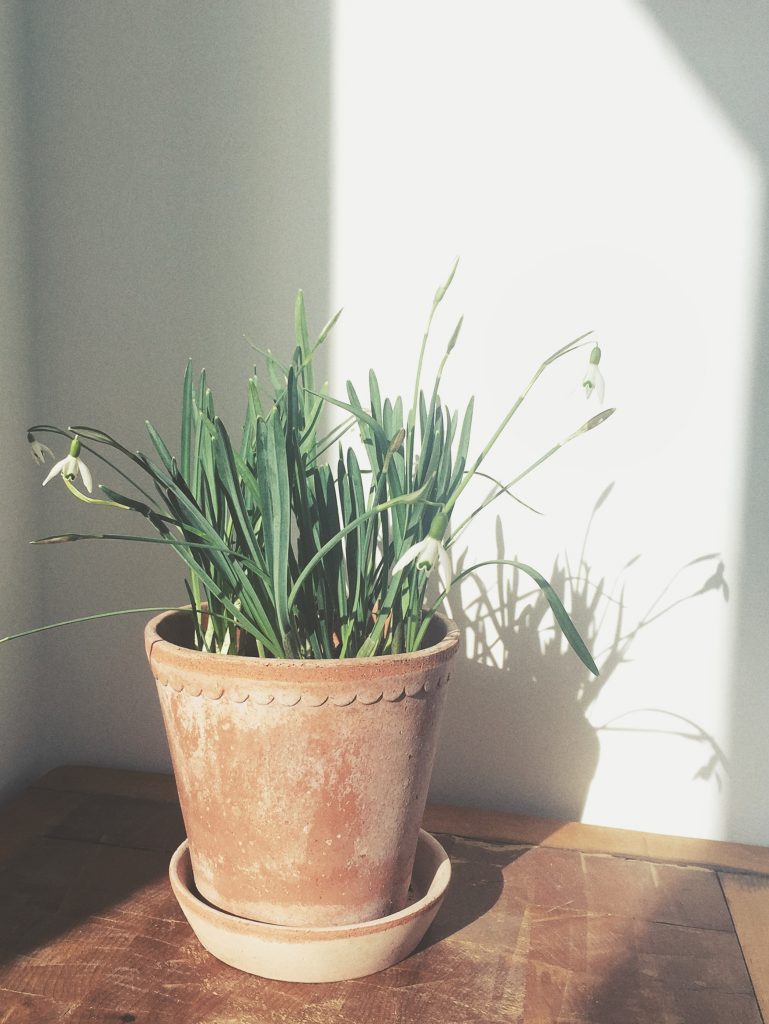
Tim found 3 wraps of snowdrops in the market last weekend and brought them back for me with the Saturday papers. Arriving in damp newspaper with pretty-much-bare roots I potted them up in some moist rich soil from under a tree in our garden. I now get to enjoy my snowdrops twice over – sat safely inside on my kitchen table while they flower, then again this time next year when they flower in their new home.

TO PLANT

  • Snowdrops like part shade (they’re forest flowers at heart) so I’ll be planting mine around the trunk of a tree in our front garden.
  • Damp, rich soil is the order of the day. Dig in leaf mulch or compost when planting if your soil could do with a boost.
  • Divide your plants into clumps of 3-4 bulbs before planting.
  • Plant each clump about 6 inches apart so that they have room to spread out and make themselves at home.
  • Existing plants can be lifted and divided again in late March/ early April to encourage an enormous great carpet of these late winter lovelies.


Esiah’s Seeds Share

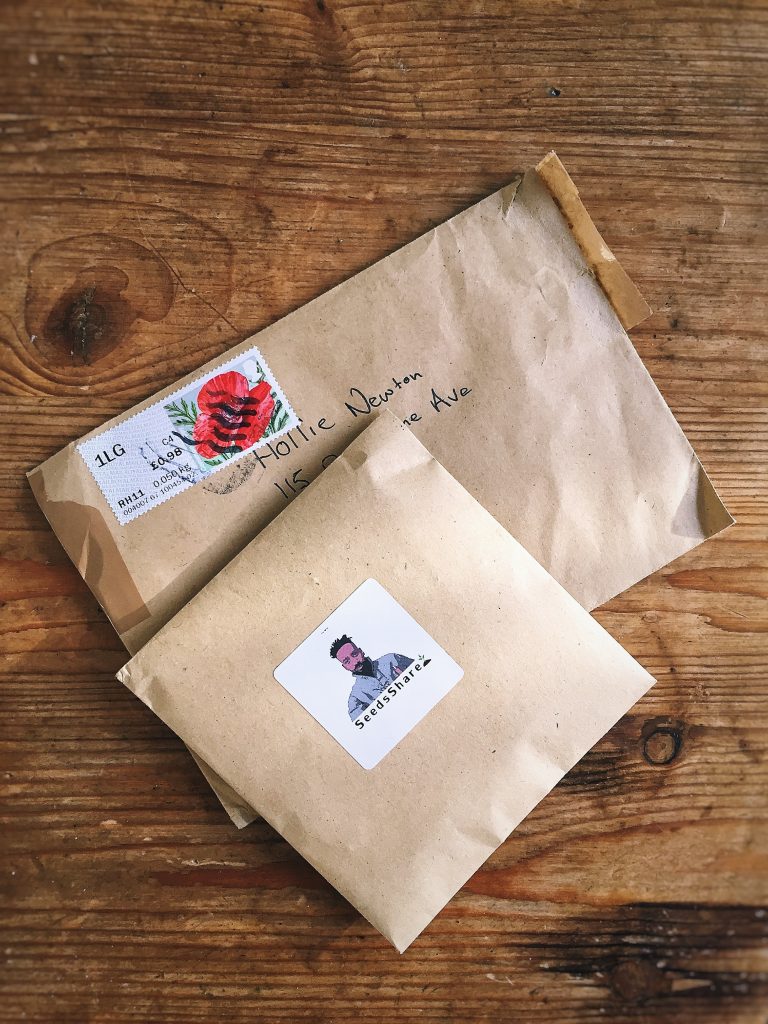
This? This right here is the most exciting little envelope to land on my doormat in a long while – a carefully filled packet of organic seeds from Seeds Share. Founded last year by Esiah Levy, Seeds Share’s mission is very simple: to allow everyone to grow food for free. Whether you’re a member of a community garden or lone gardening wolf all you have to pay for is a stamp.

Organic, mainly heirloom, irresistibly unusual varieties of vegetables and fruit FOR FREE. If, like me, most of your daily decisions are based around what you eat, this is nothing short of a horticultural miracle.

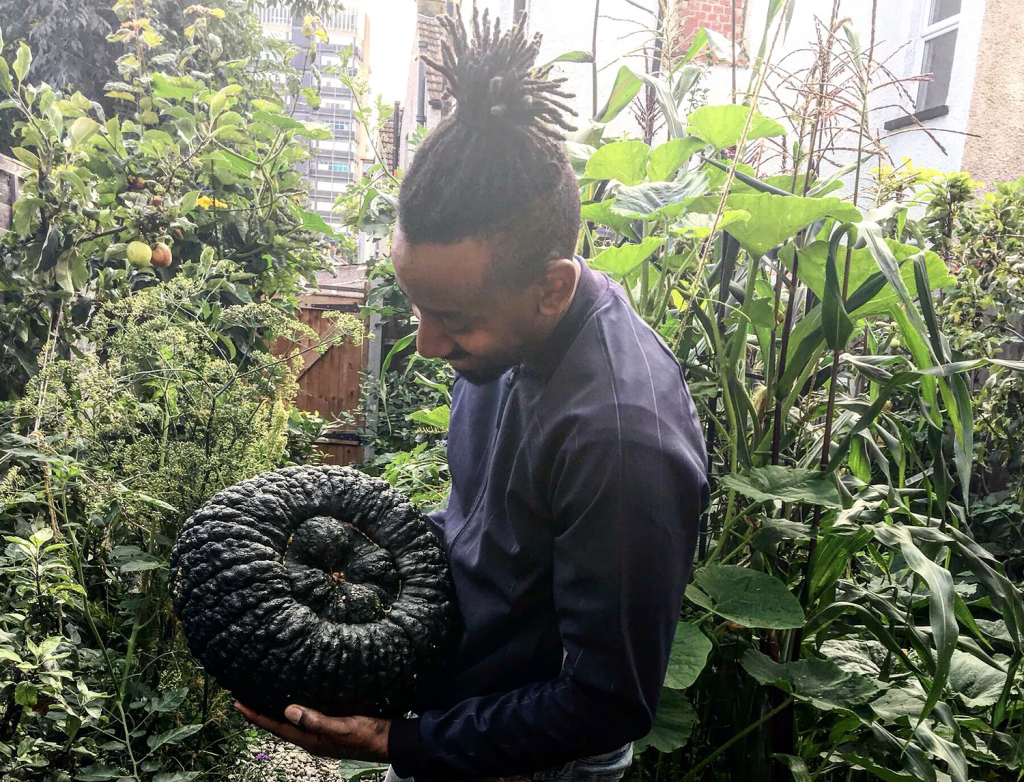
Here’s Esiah below, gently cradling a giant squash as though it were a giant warty baby. I think I’m a little bit in love with him.

Highlights from my packet of joy include, from left to right: a Turban Squash so beautiful that I may well wear it as a hat, a Marina Di Chioggia Squash with bright yellow flesh perfect for roasting, and Double Red Sweetcorn (second from the left) – truly, an Instagramer’s dream.

As well as requesting seeds from Seeds Share’s seed bank, seed donations are gratefully received. What a fabulous enterprise. Now do excuse me, I’m off to plan my squash bonnet.


Christmas Gingerbread Biscuits

I have spent much of this morning filling the house with the smell of warm gingerbread and am singing carols to myself while piping icing on everything in sight. In truth, I may have inhaled too much ginger.
Though this recipe has little to do with the garden (if only we had the weather for proper ginger growing), these are Christmassy as hell and can be hung on a tree, so here they are, resplendent in their festive selves.

Makes about 15 – depending on the size and shape of your cookie cutter

Here’s what you’ll need:

  • 1 suitably festive cookie cutter. I use a 10cm gold star
  • 300g plain flour
  • 1 teaspoon bicarbonate of soda
  • 3 teaspoons ground ginger
  • 1/2 teaspoon ground cinnamon
  • 1/4 teaspoon freshly ground nutmeg
  • 120g unsalted butter
  • 100g soft light brown sugar
  • 3 tablespoons golden syrup

For decorating:

  • 225g icing sugar
  • 2-3 tablespoons boiling water
  • A piping bag with thin nozzle

Method

Pre-heat your oven to 180C (170C in a fan oven).

Tip all of your dry ingredients into a large bowl and put to one side.

Over a low flame gently heat the butter, golden syrup and sugar in a pan, stirring until the sugar is dissolved and the mixture takes on a silky appearance. Pour into the dry ingredients and stir until you have a smooth, stiff and biscuity dough. (I usually abandon the spoon and dive in with my hands towards the end).

Line a baking sheet with baking paper and lightly dust a clean surface with icing sugar. Cut the gingerbread dough in half, then roll out the first batch to a thickness of roughly ½ cm. Carefully cut out a round of biscuits with your cookie cutter, placing them one by one on the lined baking sheet. Push the remaining dough together and lightly roll it again for a second round of cutting (I wouldn’t try a third time or the dough could become a little overworked). Then pop them all in the oven for 8-10 minutes, watching to make sure they don’t catch at the edges.

Leave them to cool on the baking tray for a few minutes (now is the time to make holes in your biscuits if you’re going to hang them on the Christmas tree), then transfer them to a rack to cool completely before icing.

To make the glacé icing, sift icing sugar into a bowl then carefully add the hot water, little by very little, stirring with a wooden spoon. You’re after a thick cream consistency. Spoon it into your piping bag, and then unleash your inner festive Jackson Pollock.


Leek & Smoked Haddock Tarts With a little cheddar and chive

Leeks are at their very best during the coldest months of the year, and though mine won’t be ready until early spring (they’re tucked up in bed overwintering as I type) the shops are full of these mellow UK grown alliums right now – just in time for festive entertaining.

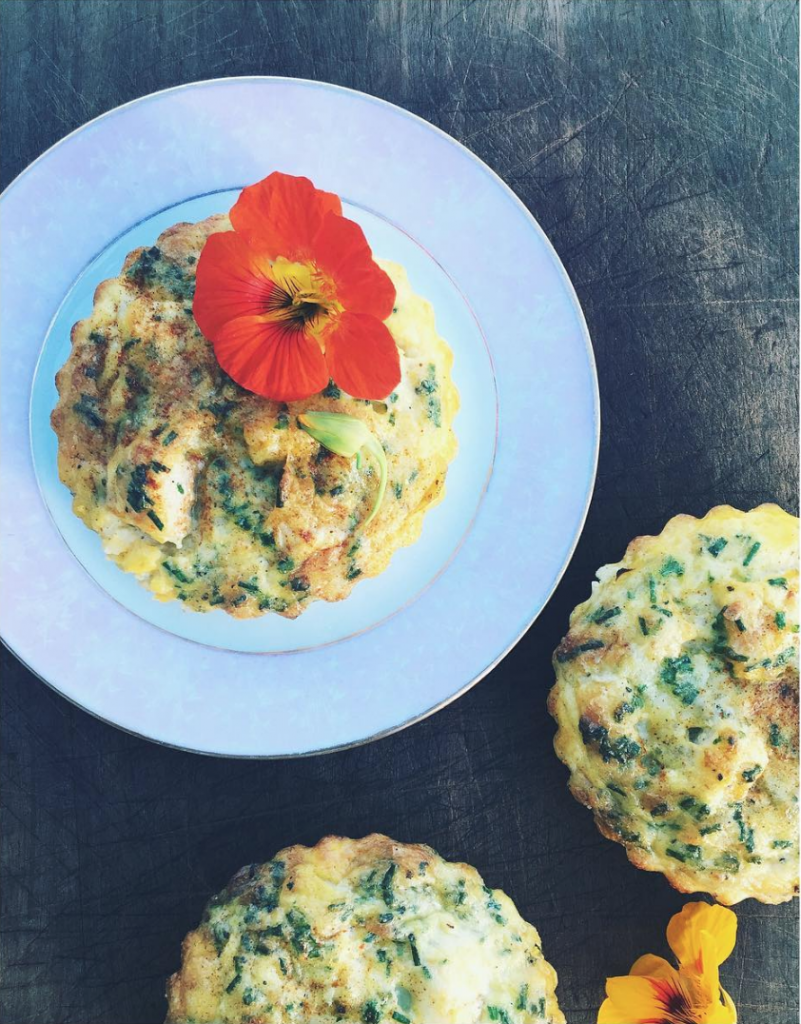
Sweet butter-softened leek and lightly smoked haddock are a match made in taste bud heaven. Perfect for a quietly impressive starter or light lunch with friends. Sustainable, non-dyed haddock from the fishmonger or counter will make all the difference.

N.B. I’ve added a few nasturtium flowers for decoration as mine are still rollicking all over the garden. This is purely for appearances’ sake.

Serves 4

Here’s what you’ll need:

  • 4x 10cm loose-bottom fluted tart tins
  • 320g good quality shop-bought shortcrust pastry
  • 3 leeks, sliced
  • 50g mature cheddar, grated
  • 150g sustainable smoked un-dyed haddock, skinned, cut into 2cm chunks
  • 100g crème fraiche
  • 100ml vegetable stock
  • 30g salted butter
  • A few sprigs of thyme, marjoram or oregano
  • A small handful of chives, chopped finely
  • A glug of white wine/ vodka
  • Plain flour for dusting
  • Cayenne pepper/ smoked paprika for sprinkling
  • Salt and pepper
  • Nasturtium flowers to decorate (if yours are still growing)

Method

Pre-heat your oven to 180C.

Lightly flour a clean surface and roll out the pastry to the thickness of roughly a £1 coin. Cut 4 circles of pastry, using the tins as a template, 2cm wider than their circumference. Carefully line each tin, pressing the pastry into each flute/ dimple, and then pop them into the fridge to chill for 15mins or so.

In a large heavy bottomed frying pan, melt the butter until golden and just beginning to brown. Add the leeks, white wine/ vodka, and turn up the heat for a few minutes. Add the stock and herbs, turn down the flame, then leave to cook down for 15mins or so, until the leeks are tender and the stock nearly all absorbed. Fish out the sprigs of herbs, then set to one side.

Take the pastry-lined tart tins out of the fridge, prick the bases with a fork, line with baking paper, fill with baking beads/ uncooked rice, then pop in the oven for 15mins. Take them out, remove the paper and beans, then cook for a further 10mins until the pastry is lightly golden.

Divide the leek mixture and haddock chunks evenly between the 4 tarts. In a small bowl, mix the crème fraiche, cheddar, chives and seasoning, then pour over the filled tarts until they’re full to the top and perilously close to spilling over. Pop the tarts onto a baking sheet and cook for 20mins until golden and starting to turn a darker brown in places.

To finish, sprinkle with a few more chopped chives, a dusting of cayenne pepper/ smoke paprika, and a nasturtium flower per tart.


Saying Goodbye To A Garden

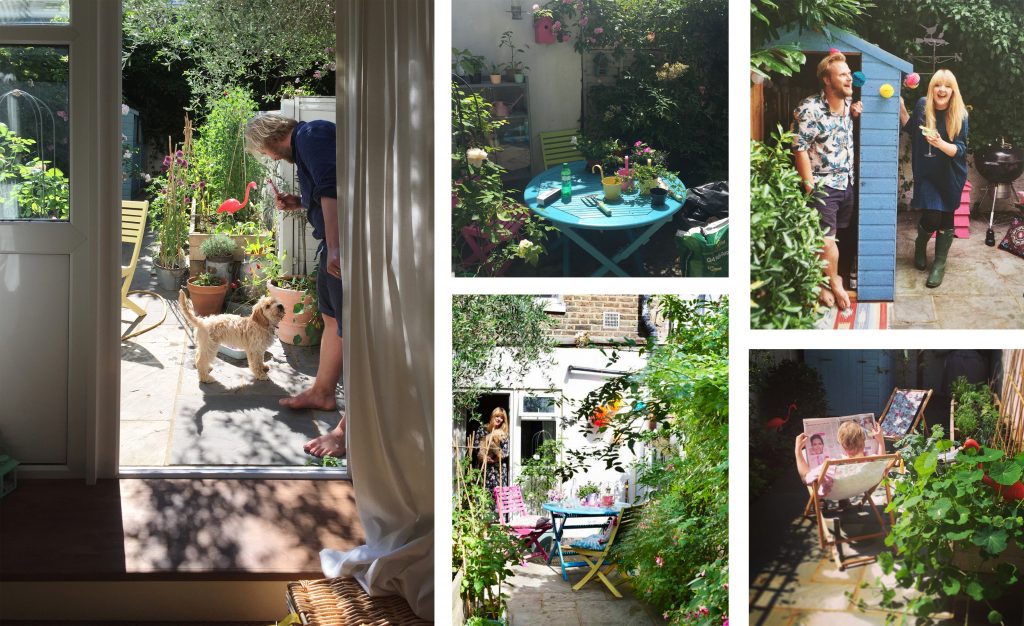
It was scrappy. It was miniscule. It had wonky fences, a dodgy shady end, and you could only get to it by walking through the bedroom. But it was ours, and we loved it.

34a St Stephens Ave, Shepherds Bush, London. A pint-sized basement flat sandwiched between the fabric shops of Goldhawk Road on one side, andUxbridge Road’s Arabian food markets on the other. On summer days the neighbourhood’s open windows would play 90s R&B and 60s reggae. In the winter you could hear church bells.

I wrote my first book here. Hit my gardening and cooking stride. We hosted birthdays, Halloweens, celebration dinners and pop-round-for-Sunday-lunches. Grew vegetables, fruit and flowers. And in our last summer, brought our lunatic terrorist of a puppy home to rip up my carefully planted borders and violate the rhubarb.

In short, it was a happy place. A sanctuary from hard jobs and a city that didn’t always feel like home. Not that it looked like that when we bought it.

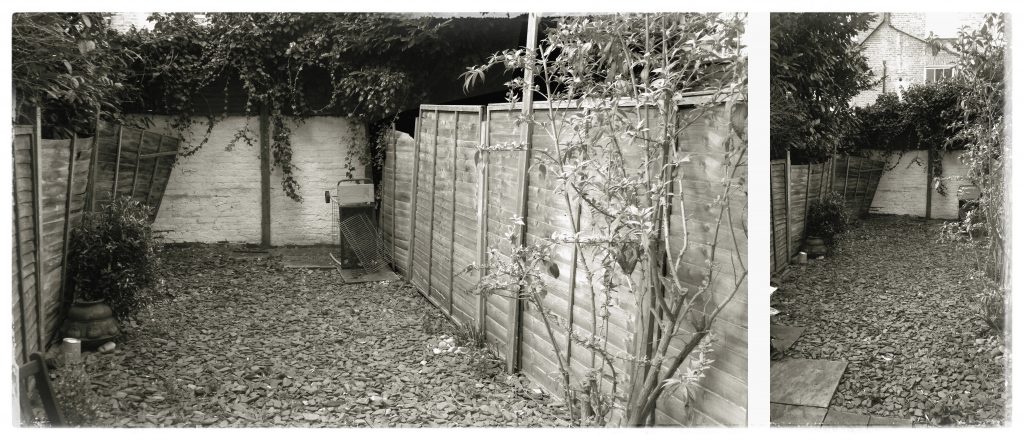
I took these pictures on the day we moved in, shown here in black and white to really ram home the post-apocalyptic communist state vibe we found it in. A barren shale-strewn garden with only an old Golden Wonder crisp packet to jolly up proceedings. To our eyes, it was Eden itself. Or at least it would be, once we’d spruced it up a bit.

If there’s one thing I learnt during our 4 years at St Stephens, it is just how dramatically you can transform an unpromising space without the slightest bit of prior experience.

What we lacked in budget we made up for in lateral thinking, begging, borrowing, outright stealing and bribing friends to help. Raised beds built from second hand scaffold planks. Knackered fences disguised with rambling rose, jasmine and honeysuckle. Mistakes laughed at and started again.

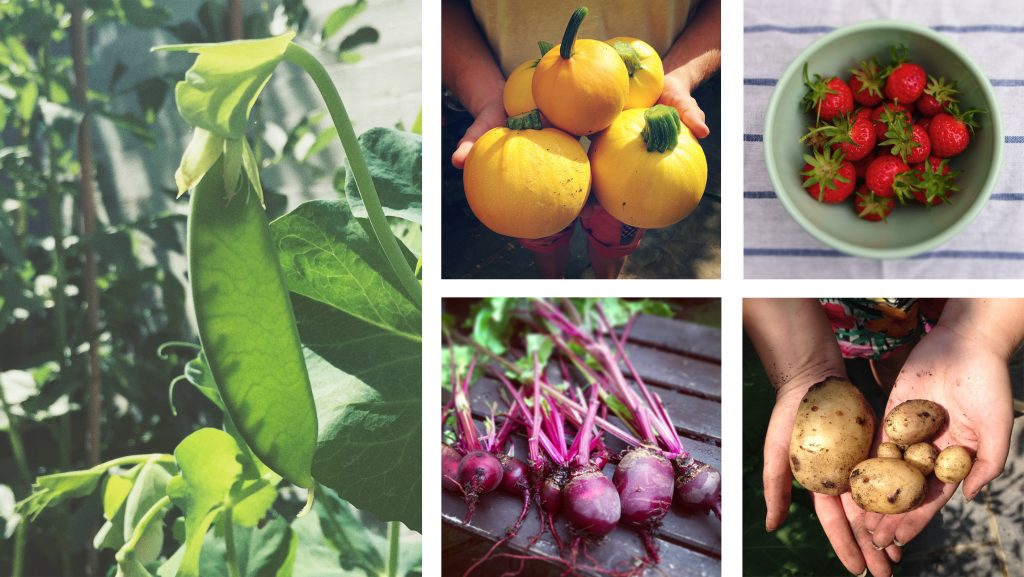
Despite its size, we somehow created a kitchen garden right in the middle of Shepherds Bush. Beans, potatoes, yellow courgettes, ringed beetroot, and summer-sweet strawberries. In learning to grow I learnt to cook with the seasons.

St Stephens was never meant to be a permanent home, but I foolishly thought that I wouldn’t miss it when we left. As is so often the case, I was wrong. At a point where life is about to take off in a new direction, the memory of that garden has floored me. Things planted and tended and still growing without us.

We are weeks away from moving into a new home. In Dorset. A house by the sea with an unhinged overgrown jungle of a garden to tame and make our own. It is, in part, why I’m starting this blog. A new life. A new garden. A new career. But as I look at these colourful photos, I find myself looking back. Out through the hideous UPVC back door we always wanted to replace and could never afford, and into our first garden, when Lettuce was still a tiny puppy, and Tim was… Well, Tim. Taunting her with a Fab lolly.

If you happen to be reading this, I have just one more thing to say before I go: if you’re lucky enough to have one, love your scrappy little garden. It is indelibly tied to who you are, your life now, your personal history, and when you look back at it, you will miss it more than you thought possible.


New York Potato Latkes

From my book How To Grow: a guide for gardeners who can’t garden yet.

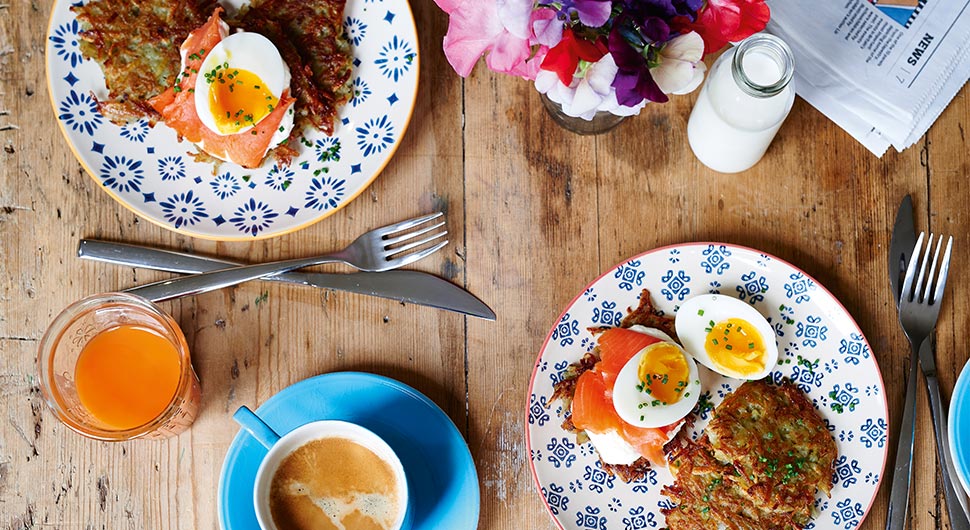
If you’re making potato latkes for breakfast, you’re going to have a bloody brilliant day. There is no bigger breakfast treat. This is also the messiest recipe I’ve ever had the pleasure to get all over myself and the kitchen of a morning. It relies on activating your potatoes’ starch, and good lord do they get sticky. Brace yourselves. I first discovered the joy of potato latkes sitting at a counter in a proper New York deli. They made them right there in front of me, on the hot plate. It was love. Or ‘lwuv’ if you want to pronounce it in true New York accent.

Serves 4

Here’s what you’ll need:

  • 1kg potatoes, peeled
  • 1 big onion
  • 25g fine matzoh meal or plain flour
  • 1 large free-range egg, beaten
  • A big sprinkle of sea salt
  • A few big cracks of black pepper
  • Olive or vegetable oil, for frying

To serve (optional):

  • Good-quality smoked salmon
  • Homemade horseradish sauce
  • Fresh chives

or

  • Soured Cream
  • Apple sauce

Method

First of all, it’s grating time. Find yourself a large mixing bowl, a sturdy grater and an almost inhuman reserve of energy. Grate all the potatoes and onion on the largest grater setting and mix together in the bowl (I use my hands).

Turn out the grated potato and onion onto a large clean tea towel. Roll it up and squeeze with all your strength to remove as much moisture as you can. The drier the mixture, the better the latkes will turn out.

Drop everything back into the bowl and add the matzoh meal, egg, salt and pepper. Mix well with your hands. If it’s getting stuck all over you, it’s going well.

In a deep frying pan, heat the oil until moderately hot. Place heaped tablespoons of the mixture into the pan a little distance apart, pushing down on each one with the back of a wooden spoon to flatten them out. Turn down the heat to medium and cook for about 5 minutes on each side, flipping when the edges turn from golden to dark brown. If they brown too quickly, knock the heat back or take the pan off the heat for a minute.

Remove the latkes from the pan and set on kitchen paper to drain. Continue cooking until you’ve used up all the mixture, then serve while they’re still piping hot.

Serve with a dollop each of soured cream and apple sauce, or – my personal favourite – a helping of really good-quality smoked salmon, homemade horseradish sauce and a sprinkle of fresh chives.


Salt Baked Beetroot

From my book, How To Grow: a guide for gardeners who can’t garden yet.

As my splendid friend, Ben ‘Yes Chef’ Christopherson said when I ran him through this recipe, ‘I love this, it tastes amazing, and there is the element of “why the hell am I doing this, this can’t possibly be right?”, which all the best recipes should have.’ Wise words, Ben. Wise words.

Serves 2 as a side dish, or 4 as a starter with smoked salmon.

Here’s what you’ll need:

  • 1 nice round beetroot
  • 1 box of Maldon Sea Salt (or any good quality salt)
  • 2–3 sprigs of thyme

Method

Preheat your oven to 160C/300F/gas 2.

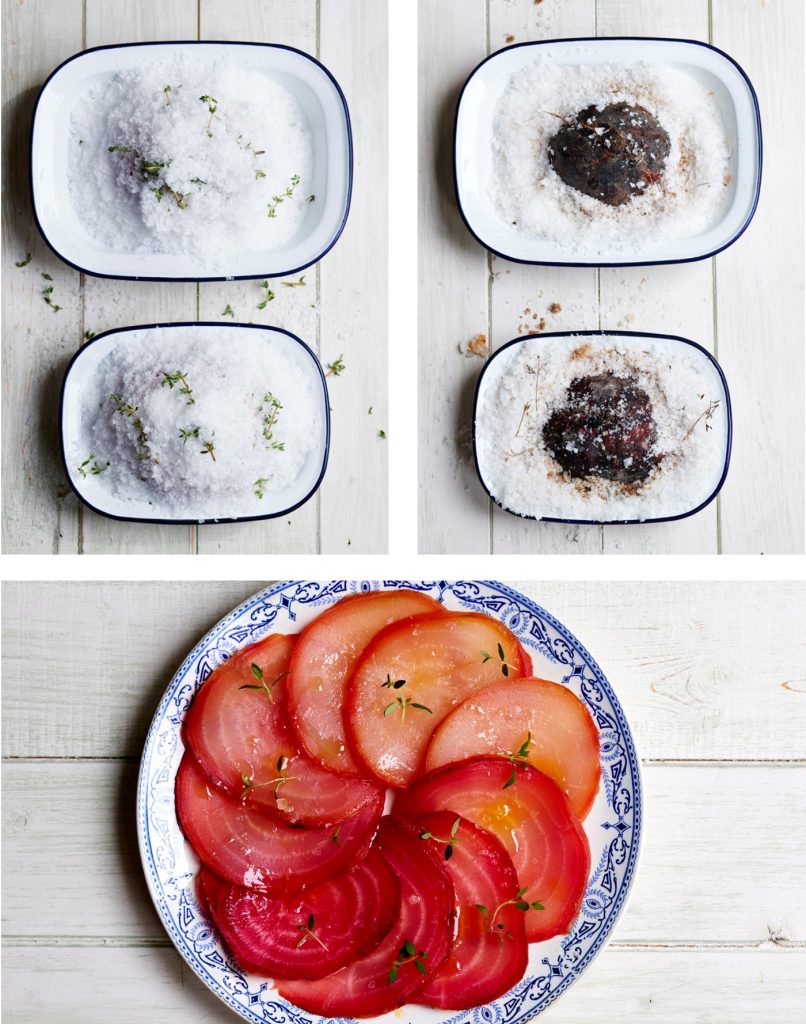
Rummage around for the smallest ovenproof dish that will fit your beetroot as snuggly as possible. Pour a generous layer of salt into the dish, making a large dimple to rest your beetroot on, and pop him in. Add the thyme on top and around your beetroot, then keep pouring salt until your beetroot is entombed in a salt mountain. Then pop him in the oven for 45–60 minutes.

The beetroot is done when a sharp knife slips in easily. A bit like pasta, the perfect texture of beetroot is down to personal taste. I like it a little firm in the middle, so take it out after 50 minutes. It also depends on the size of your beetroot, so pop him back in for a bit longer if he isn’t quite done.

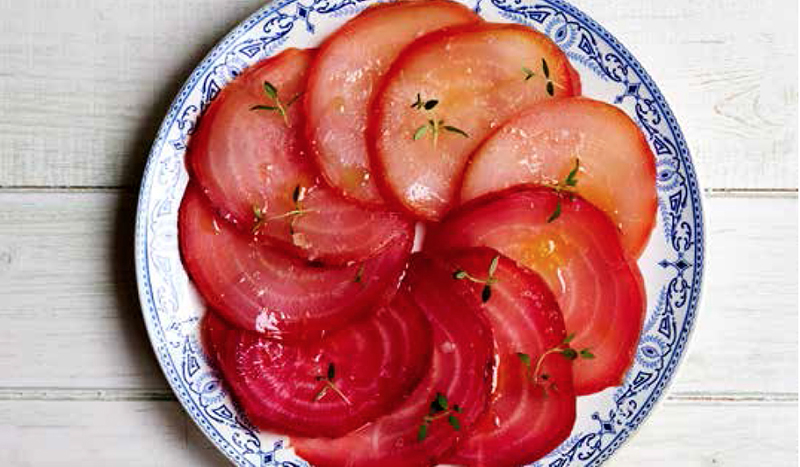
Once cooked, remove the dish from the oven and leave to cool for a few minutes. Then dive on in there and rescue your baked beetroot. (I let the salt cool, then keep it in a Kilner jar to use again.) Slice his skin and ends off by running a knife from top to bottom, gently peeling it away. Carefully slice into thin slices, then arrange in an impressive, arty fashion on a plate.

An excellent side dish, or delicious starter served with slithers of smoked salmon, watercress, good olive oil and freshly grated horseradish.